Do you need Help or Advice – Call Us Now

Glass Balustrade Advice

Our team is always on hands to assist you with Your Requirements

Our in-house experts have many Years’ experience. Whether you have only a photo, an architects’ drawings, technical drawings or just a free hand sketch we can help.

We are happy to support you when deciding which system or design would best suit your project and what components you need to achieve this.

If you have any questions or need assistance with your order please contact us using one of the below methods.

Please note our opening times to the right, these are also the best times to call.

Opening Times

Monday 8:30am – 5pm
Tuesday 8:30am – 5pm
Wednesday 8:30am – 5pm
Thursday 8:30am – 5pm
Friday 8:30am – 4pm
Saturday Closed
Sunday Closed

Glass Channel Installation Guide

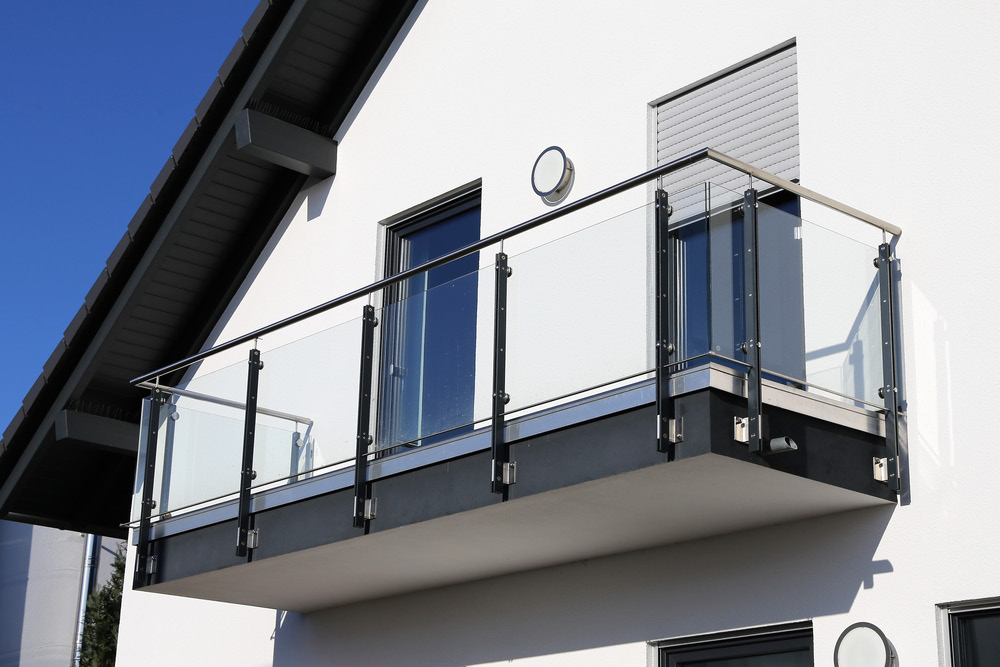
Glass channel fitting instructions

Place your aluminium channel against the area you intend to fix to. Use this as a template to mark out the holes for drilling. Then remove the channel and begin to drill your holes.

Your fixing method will determine the size of hole you will need to drill. Please see the guide below for fixing into concrete or brick. When fixing into other surfaces, please contact our Sales Team.

PLEASE NOTE: If you are unsure of the quality of the structure you intend to fix to, please seek the advice of a professional.

Concrete & Brick

Proceed to drill your holes using a 14mm drill bit. This will allow enough space for the ChemFix and the M12 studding. You will need to cut your studding into equal lengths. The length of each piece will depend on how far into your substrate you intend to fix.

PLEASE NOTE: Square 1 advise the minimum distance to fix into your substrate is 120mm,
however, this distance can be assessed on site.

Taking 120mm as an example, you will require an additional 15mm of studding to expose through the hole in your channel, providing you with enough exposed studding to tighten a nut and washer onto. i.e. You have a hole that is 120mm into the ground: 120mm + 15mm = 135mm. This means each piece of your studding will need to be cut to 135mm.


Once you have all holes drilled and all necessary studding cut to the required lengths, you will then need to slowly apply your ChemFix into the holes.

The ChemFix sets quickly so once you have applied it to the first 9-12 holes, place down the applicator gun and begin to twist your studding into each hole. You may find that on twisting the studding, you have a small amount of excess leaving the hole as it reaches the bottom.

Please be sure to remove the excess as it can become difficult to remove at a later stage once it has set. Repeat this procedure until all holes are filled with studding and then leave to set for 60 minutes.

You will need to change applicator nozzles as the ChemFix will set inside fairly quickly.
Once the ChemFix has set, proceed to place your channel back over the exposed pieces of studding and fix to the ground using your washers and nuts.


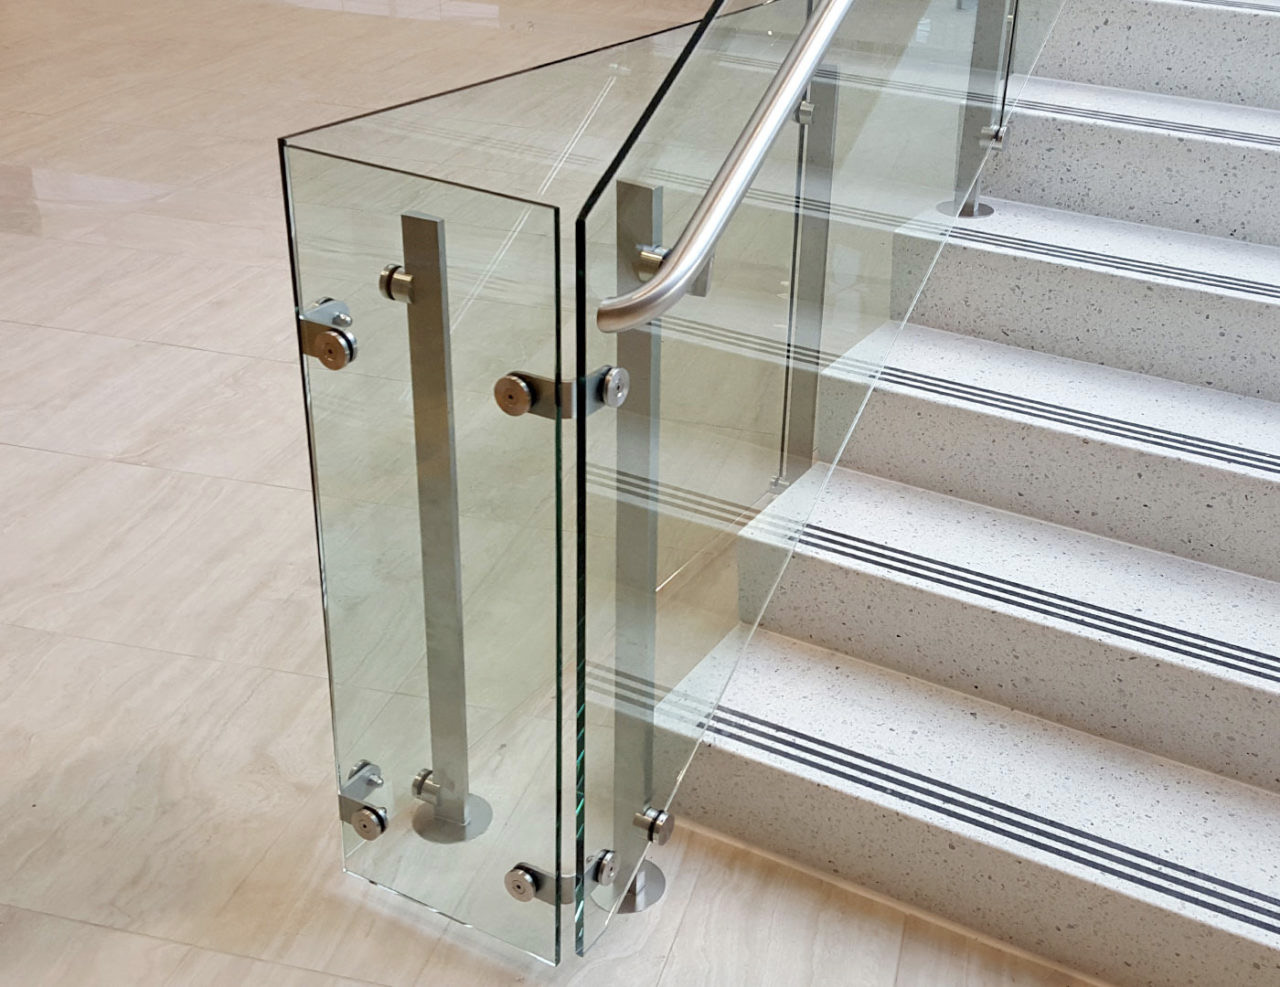
The glass clamps need to be positioned on the bottom of the glass when inserting them into your channel.

This requires you to lift the glass off the floor sufficiently to squeeze the clamps on or turn the glass upside down to attach them. Please see the recommended spacing of clamps for specified glass thicknesses below.

All glass thicknesses have been tested under BSI6180 and documentation can be provided upon request.
19mm = 5 clamps per metre
15mm, 17.5mm & 21.5mm laminate = 4 clamps per metre
12mm = 3 clamps per metre


Once your glass panel is positioned in the channel with the clamps spaced accordingly you now need to place in your clamp bars. Each clamp will require two clamping bars, one either side of the glass. These are positioned so that the screw faces the wall of the channel.


When all of the clamping bars are positioned correctly, they need to be tightened. To tighten the clamps onto the glass, you need to turn the bolt on the clamping bar anti-clockwise, so that it begins to meet the channel wall. Whilst carrying out this procedure, please ensure the glass is flush using a spirit level. It is recommended that you tighten the clamps at either end of your glass panel before clamping the intermediates.


Once all of your glass is securely clamped within your channel and you are satisfied with the positioning, you need to clip on your aluminium cover seal. Take your rubber gasket and feed into your aluminium strip using lubricant.

PLEASE NOTE: Do not stretch the rubber gasket.

Once the gasket has been fed into the cover strip, it can now be clipped onto your channel. Start from one end and make your way down. Clip any end caps and side/bottom cladding on to finish.

For further help fitting your Balustrade System, please contact our Sales Team.

Glass Bracket Installation Guide

Glass Brackets

Once you have successfully installed your steelwork, the last step is to install your glass infill. Remove your glass brackets from the packaging along with the correct sized rubbers.
Every glass bracket includes both rubbers to accommodate 8mm and 10mm glass, a safety pin and an M8 x 20mm socket cap screw for you to fix the bracket to your upright.

PLEASE NOTE: The safety pin is only used when suspending glass at height.
The clamping brackets and rubbers are strong enough to successfully secure your glass in place.


Apply the correct size rubber to the inside of your bracket and fix the body of the bracket onto your upright. For your convenience, Square 1 pre-drill and tap these holes, however, should you need to drill and tap on site, please refer to the Square 1 Handrail Fitting Instructions. It is the customer’s decision which side the brackets face. Tighten the screw through the body of the glass bracket into your upright using a 6mm Allen key.


The glass panel sizes are decided by the customer. Once all brackets are securely fixed to your uprights you will need to calculate the size of your glass. Square 1 recommend that to comply with current building regulations, once a glass panel is securely fixed in between the brackets, a sphere with a 100mm diameter should not be able to pass through any of the gaps. This includes the gaps between the upright posts and the glass, the handrail and the glass, and lastly, the surface you have fixed the balustrade onto and the glass.

If you have fixed your balustrade onto a level surface, your glass panels will be a rectangle. To calculate the “width” of your glass, take the measurement between the area within the glass bracket where your glass will rest, up to the same area on the opposing glass bracket, then minus 10mm off the total for some “play”. 3) i.e. Inside of glass bracket to the inside of opposite glass bracket is 900mm. (900mm – 10mm = 890mm) Glass Width: 890mm To calculate the height of your glass, measure from the ground to the underside of your handrail and minus the size of the gap you wish to leave, ensuring that this is no more than 100mm.

Square 1 would recommend a 70mm gap between the handrail and the glass, and the surface you have fixed to and the glass. 4) i.e. Measurement from the surface area to the underside of the handrail is 1050mm. (1050mm – 70mm – 70mm = 910mm) Glass Width: 910mm If your glass panels are a “non-standard” shape, Square 1 advise that templates of the glass are made using a material that can be shaped into exactly how you wish your panel to look. This must be strong enough to be transported to us via courier and onto our glazier for processing. Our recommendation would be MDF wood.

PLEASE NOTE: Square 1 is unable to supply any materials required to template glass. We can offer to collect the templates from the customer at the


On receipt of your glass, place into the glass brackets and tighten the glass clamp, ensuring the glass is securely clamped in all areas.

Important Information – Please Read Square 1 will do our very best to advise and guide on the most suitable and safest system for each individual project, however it remains the customer’s responsibility to ensure the final specification complies with current building regulations.

We also advise and supply the relevant fixings to enable the installer to fix certain materials, however, it remains the installers responsibility to ensure that the area in which the system is to be fixed is structurally supportive and has been approved by a structural engineer.

For further help fitting your Balustrade System, please contact our Sales Team.

Handrail Installation Guide

Once you have all upright posts firmly fixed to your surface and you are happy with the strength of each, proceed to place your handrail supports into the top of each upright.

Place any elbows you may have into the ends of your handrails and down onto your fixed uprights.

PLEASE NOTE: DO NOT use any MMA Adhesive at this time.


Tape the handrail supports to the handrail using gauze tape. Remove the handrail completely from the uprights ensuring the supports are securely taped in the exact position they were when the handrail was in place.


Using a felt pen, mark the holes on the handrail where your handrail support is positioned. Once all holes are marked and you are happy with their positions, un-tape the handrail supports.


Ensuring your handrail is securely positioned within a vice or similar mechanism, place a small piece of gauze tape over the marked area and using a sharp point, gently mark a pilot hole into your handrail – this will assist you in drilling your hole. Place lubricant onto your drill bit and proceed to drill the holes into your handrail. The correct size drill bit and tapper are included in your order.

PLEASE NOTE: Take it slow when drilling holes into your handrail.

Once you have successfully drilled all holes into your handrail, you now need to tap them. To tap the hole, drill into it with the tapper. Remove all tape once all holes are drilled and tapped.


Once all holes in your handrail(s) are drilled and tapped, proceed to replace your handrail supports, marrying up the holes in your handrail supports to the holes in your handrail. Place fixings through the underside of your handrail support and tighten until the handrail is securely fixed to handrail support. Repeat until all handrail supports are securely fixed to your handrail(s).


Apply MMA Adhesive onto the male fitting of your handrail supports and the male fitting of any elbows on the end of your handrails. Proceed to place the handrail supports and elbows into your uprights.

PLEASE NOTE: The MMA Adhesive sets very quickly.


Using gauze tape, securely tape any areas that you have applied MMA Adhesive to act as extra support. Leave to set for 24 hours.

For further help fitting your Balustrade System, please contact our Sales Team.

Modular System Installation Guide

Modular System

Square 1’s stainless steel post and handrail Modular system are designed to provide a user-friendly solution for the most bespoke balustrade requirements. The stylish modular system is available in a variety of contemporary infill solutions including glass, wire or rod; giving you complete freedom of design. Our satin finish and mirror polished product range include both AISI 304 (Inside) and AISI 316 (Outside) grade stainless steel in 42.4mm and 48.3mm diameter tube

Place your base plate down on the surface you will be fixing to, ensuring that the full plate sits flush and there are no obstacles between the surface and the bottom of the base plate. Once in position, mark out the holes onto the surface using the pre-drilled holes in the base plate. Continue this process for each base plate you intend on fixing to the surface.


Once you have marked out the holes for each base plate and are happy with their positions, you now need to drill them.


The size of the studding you have purchased will determine the size of the hole you need to drill. A hole one size up from the studding thickness is required. i.e. If you have purchased M8 studding, you will require an M10 hole. If you have purchased an M10 studding, you will require an M12 hole etc. Continue to drill out the holes using the correct size drill bit.

We advise customers to drill at least 100mm straight down into the surface they are fixing to. Once all holes are drilled they need to be cleaned of any excess debris that may remain inside the hole. The next step is to calculate the length of each stud you require to fit into the hole.

This can be calculated by taking the distance drilled into the ground plus 15mm.
i.e. You have a hole that is 120mm into the ground: 120mm + 15mm = 135mm.
This means each piece of your studding will need to be cut to 135mm.
You will require one piece of studding per hole drilled, cut to your calculated size.


Take your ChemFix and slowly apply into each hole. The ChemFix sets quickly so once you have applied it to the first 9-12 holes, place down the applicator gun and begin to twist your studding into each hole you have applied ChemFix into. You may find that on twisting the studding into the hole, you have a small amount of excess leaving the hole as the studding reaches the bottom.

Please be sure to remove the excess as it can become difficult to remove at a later stage once it has set. Repeat this procedure until all holes are filled with studding and then leave to set for 60 minutes. You will need to change applicator nozzles as the ChemFix will set inside fairly quickly.


Once complete, place your base plates back over the exposed studding. Lastly, place your washers, followed by your nuts onto each piece of the studding. Tighten up each nut so that the base plate is securely fixed to the surface. To finish up, place your base plate covers over the base plates to cover all exposed fixings.


Take your upright posts and apply the necessary amount of MMA Adhesive to the male fitting exposed from your base plate.

PLEASE NOTE: The MMA Adhesive sets very quickly.

Proceed to place all upright posts over the exposed male fittings of the base plates.
For further help fitting your Balustrade System, please contact our Sales Team.

Building & Loading Regulations

With any project, the importance of safety has to be at the forefront of our minds when considering the most suitable balustrade system. With this mentality we work closely with our clients, providing advice on loading and dimensional specifications in line with The Building Regulations K2 Document. Please click the link below to download a copy of the K2 Document.

Stainless Steel Specifications

Our balustrade range comprises of AISI 304 and AISI 316 stainless steel, both of which are available in a 320 grit brushed satin finish or a mirror polished finish. AISI 304 and 316 stainless steel appear the same but perform very differently depending on the surrounding environment. This is due to the differences in the chemical composition between the two grades with AISI 316 offering more resistance to corrosion due to the molybdenum content. In line with industry guidelines, as a general rule, we recommend AISI 316 for outdoor use and AISI 304 for interior projects. Although satin and mirror polished contain the same chemical composition, they appear very different due to the final surface finish. The mirror finish is polished down to approximately 0.2 microns, which produces a very smooth and reflective surface, making it the most suitable finish for coastal and busy industrial areas containing high emissions. Unlike the satin finish, which is polished down to approximately 0.5 microns, mirror polished provides minimal areas for corrosive elements in the air to rest, which potentially cause permanent damage to your system. The table below can be used as a rough guide to which grade/finish is appropriate for certain environments.


Grade Rural Urban Industrial Coastal
Internal External Internal External Internal External Internal External
Satin 304
Satin 316
Mirror 304
Mirror 316

Glass Specifications

Square1’s approach to safety is paramount which equally extends to our choice of glass as an infill solution for your balustrade system. All glass supplied by Square 1 is manufactured in accordance with BS EN 12600:2002 and our dedicated team will work closely with you to determine the best glass option for you based on the load information you provide. We recognise that clients need a ‘one-stop’ solution when it comes to purchasing a glass infill balustrade and so Square 1 has established a partnership with leading glass processor’s who are leading suppliers of quality architectural glass products throughout the U.K. Whether your requirement is for a domestic glass balustrade for your patio or balcony or a large commercial development, we can supply toughened or toughened & laminated glass to suit your needs. When you contact Square 1 with your glass enquiry, our experienced and helpful team will determine the right glass for you. We will ask some key questions about your requirement which will enable us to discuss the various options with you:

Choosing the right glass for you

  • The height of the glass you require
  • Placement of the glass balustrade (internal or external)
  • Is a stainless steel handrail required
  • The loading the glass balustrade needs to achieve – this can be provided by a structural engineer or your local building control officer

Once we have established this information, we can discuss what thickness of glass will be required and whether this will be provided as toughened, heat soaked glass or toughened and laminated glass. Toughened glass is ideally suited to most applications where safety is critical, but consideration should be taken if the glass balustrade is at a high level. Toughened & laminated glass is constructed of two pieces of toughened glass either side of a laminate interlayer and offers the same strength under impact as toughened glass with a crucial safety difference – If the pane is damaged resulting in the glass breaking, the fragments will be retained by the laminate interlayer, enabling the system to still act as a barrier until a replacement can be installed. As your glass balustrade will not only need to look great it is also designed to be a key safety feature in your environment. As safety is paramount to Square 1, we can call upon the services of an industry recognised Structural Glass Consultancy who, from the information provided to them, can determine precisely what type of glass is required to achieve the strength it is intended for. For your peace of mind, they can provide a written report detailing the calculations used to determine this. The glass delivered to you will have polished edges and radius corners as standard unless otherwise asked for. We can also supply frosted/sandblasted glass, silkscreen printed glass as well as etched glass and drill holes up to 30mm diameter – contact our friendly team for more information.

Quality assured glass production

As with many products that are available to today’s consumer, toughened glass is available from ‘KITE MARK’ approved suppliers. The product standard that covers this area is BS EN 12150, impact performance requirements for flat safety glass and safety plastics for use in buildings. BS EN 12150 a Kite Marked product standard, which means that a manufacturer of the product may choose to adhere to the regulations and guidelines that are specific to that Kite Mark scheme. The British Standards Institute controls the Kite Mark License scheme and is responsible for audits and testing regimes. Only when satisfied that a particular product is satisfactory and that manufacturing controls are in place to ensure continuous compliance, will a Kite Mark License be granted. Kite Mark Licenses are issued for each product type, i.e. a manufacturer may process and supply a wide range of thickness of toughened glass, but only have a Kitemark license for one. Square 1Supplied glass, all glass thickness, tints and finishes are included on the Kite Mark License scope. Continuous assessment and monitoring of production methods and working practices ensure that Square 1 glass partner provide a fully compliant product to our customers in the marketplace.

  • BS EN 12150 Glass in building – Thermally toughened soda lime silicate safety glass
  • BS EN 14179 Glass in building – Heat soaked thermally toughened soda lime silicate safety glass
  • BS EN 14449 Laminated glass and laminated safety glass

Delivery to your door

Square 1 can arrange to have your glass delivered to the majority of locations on the UK mainland. By using a dedicated courier for your glass, we can ensure your order arrives safely and in perfect quality for use in your balustrade system. The cost of the delivery will be determined by the location of where it is required. This will be advised to you at the time of your enquiry.

Enquire Now

    • Lucy Bello ★★★★★
      Excellent company, professional service throughout. We love our bannister. Would highly recommend this company to new customers, you will not be disappointed.
    • J Lister ★★★★★
      Excellent service from all departments of Square 1.Excellent infinity glass balustrade product.The MD always available for advice and guidance as was the in-house team.The 2 tradesmen Steve and Gary were exceptional with extremely high … More standards, flexibility and technical implementation skills with loads patience to match!The Company gave us a warm comfort that is quite difficult to find in the construction industry of today!I would certainly use Square 1 in preference again and recommend the Company without any reservations.A perfect job guys thank you.Jamie Lister.
    • Sam Kirby ★★★★★
      Great company with a positive attitude. Nothing is too much trouble and provided everything for me to carry out a D.I.Y. Glass Balustrade Installation.
    • Steve Roberts ★★★★★
      Had a steel wire balustrade system fitted and I am very pleased with the end result. The 2 fitters were very friendly and courteous at all times and kept us informed of what they were doing. They also cleared up as they were working and … More were professional throughout. Thank You
    • David Kendall ★★★★★
      Square 1 Architectural Solutions Ltd are very professional, knowledgeable and are a well organised team from office to installation. Overall serviceability exceptional, this company really cares! We are a business, so all these points listed … More above are important to us.
    • Aimee Brander ★★★★★
      I wanted a local company to install a balustrade, gave Square 1 a call and they sent someone out to have a look at it the next day. Worked out a price and had my balustrade installed within 3 weeks. Staff helpful and friendly, very happy! … More
    • Rosalind Godwin ★★★★★
      Square 1 supplied and fitted a new balcony balustrade for us. It was a very quick and efficient service and the fitters were very pleasant providing a very tidy job.
    • Melanie Blank ★★★★★
      Very Happy with my new juilette balcony, excellent quality, from start to finish excellent service.Thank you.

    Close

    Your Basket

    Contact Us